Elevate Your Exterior
Transform Your Outdoors with West Hills Masonry!
Call our Professional Contractors!
(714) 519-5009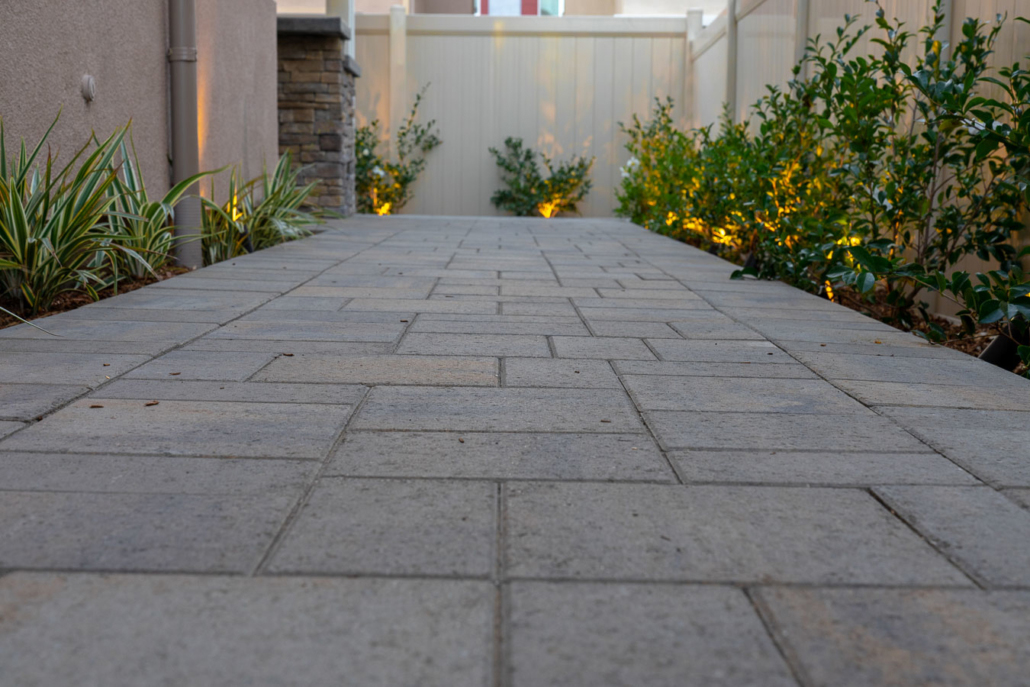
When it comes to creating an outdoor space, a paver patio is a popular choice. However, the process of installing patio stones on grass or dirt can be daunting but a trusted hardscapingHardscaping refers to the non-living elements of landscaping, such as stone, brick, concrete, wood, ... contractor can get the job done seamlessly!
Before you start, it's important to select the right pavers and base materials for your project and to prepare the ground properly. This involves removing any grass or loose soil, creating a levelA level is a tool used to determine whether a surface is horizontal (level) or vertical (plumb). It ... base, and adding a layer of sandSand is a fine, granular material composed of finely divided rock and mineral particles. It is a fun... and/or gravelGravel consists of small, loose, rounded or angular stones, typically ranging in size from a few mil....
Once the base is set, you can lay the pavers using a combination of sand and polymeric sandPolymeric sand is a fine sand mixed with additives that bind the sand particles together, used in la... for stability. This overview provides just a taste of what's involved in installing patio stones on grass and dirt, and our hardscaping contractor can help you with all the details.
Before laying patio stones, it's crucial to prepare the ground properly to ensure a sturdy foundation. Start by removing any grass or other vegetation from the area where you plan to install the patio.
Next, remove any loose soil or debris and create a level base. A spirit level and a straight edge can be helpful for this step. Once you have a level base, add a layer of gravel or crushed stoneCrushed stone is a form of aggregate composed of rocks that have been broken down into small, angula... to create drainage and prevent the soil from shifting.
Finally, add a layer of sand and compact it down to create a stable surface for the patio stones. With these steps complete, you're ready to start laying the patio stones.
Choosing the right stones for your patio can make a big difference in both the look and functionality of your outdoor space. When selecting your stones, consider the size, shape, and color of the stones.
If you have a large outdoor space, bigger stones may be better to create a cohesive look. If you're working with a smaller area, smaller stones may be more appropriate. Additionally, consider the type of stone that best suits your needs, whether it's concrete paversConcrete pavers are precast, man-made paving stones made from a mixture of cement, sand, gravel, and..., brick paversBrick pavers are rectangular, kiln-fired blocks made from clay or shale, used primarily in paving ou..., or natural stone.
With a wide range of options available, you can find the perfect stones to complement your outdoor space.
Laying patio stones on grass can be a great way to create an outdoor space that is both functional and attractive.
With these simple steps, you can transform your grassy lawn into a beautiful and practical patio area.
Installing patio stones on dirt is similar to installing them on grass. The first step is to prepare the ground by removing any plants, rocks, or debris. Next, mark the area where you want to lay the patio stones using stakes and string. Then, dig down about six inches and make sure the soil is smooth and level.
Add a layer of gravel and tamp it down to create a solid base. Then, add a layer of sand on top of the gravel and make it level. Finally, lay the patio stones in your desired pattern, using a spirit level to ensure they are level. Fill in any gaps between the stones with polymeric sand, and you're done!
When it comes to installing patio stones, having the right tools on hand can make all the difference. Here are some essential tools you'll need for a successful project:
By having these tools ready, you'll be well-equipped to tackle your patio stone installation project with confidence.
Once the patio stones are in place, it's important to add the finishing touches to ensure that your patio looks neat and polished. One of the key finishing touches is edging. Edging creates a clean border around the patio area and helps to keep the stones in place.
To create edging, you can use paver edging or plastic landscape edging. Paver edging is made from the same material as the patio stones and creates a seamless look, while plastic landscape edging is more affordable and easy to install.
After the edging is in place, it's time to fill the joints between the stones. Polymeric sand is a popular choice for joint filling as it hardens when wet, creating a strong bond between the stones. By adding edging and filling the joints, your patio will look more professional and last longer.
To keep your patio looking great for years to come, proper maintenance is essential. Regularly sweeping away debris and cleaning up spills can help prevent stains and damage to the stones. It is also important to keep an eye out for any weeds that may try to grow in between the stones and remove them promptly.
In addition, you may want to consider applying a sealant to the stones every few years to protect them from water damage and fading. Finally, be mindful of heavy objects or furniture that may scratch or crack the stones and use padding or coasters as needed.
With these simple tips, you can ensure that your patio will continue to be a beautiful and functional addition to your outdoor space for years to come.
Installing patio stones on grass and dirt may come with some challenges. While it is a relatively easy and cost-effective way to create an outdoor space, there are some common problems you may encounter.
Some of these issues include the stones sinking, unevenness, and poor drainage. However, these problems can be solved by taking certain measures, such as properly preparing the ground and using the right base materials.
Other issues like weeds growing between the stones or ant infestations can be prevented by regular maintenance. With proper care and attention, your patio can be a beautiful and functional outdoor space for years to come.
Looking to have patio stones installed on your grass or dirt surface, but feeling overwhelmed by the process? Let the professionals at West Hills Masonry handle it for you.
Our experienced hardscaping contractors have the expertise and tools necessary to ensure your patio installation is done properly and efficiently. Don't risk a DIY job that could end up costing you time and money in the long run.
To schedule a consultation and let us create the perfect outdoor space for you, contact us at 714-519-5009 at West Hills Masonry today!
 Carlos Gonzales
Locations We Serve
Schedule A Consultation