Elevate Your Exterior
Transform Your Outdoors with West Hills Masonry!
Call our Professional Contractors!
(714) 519-5009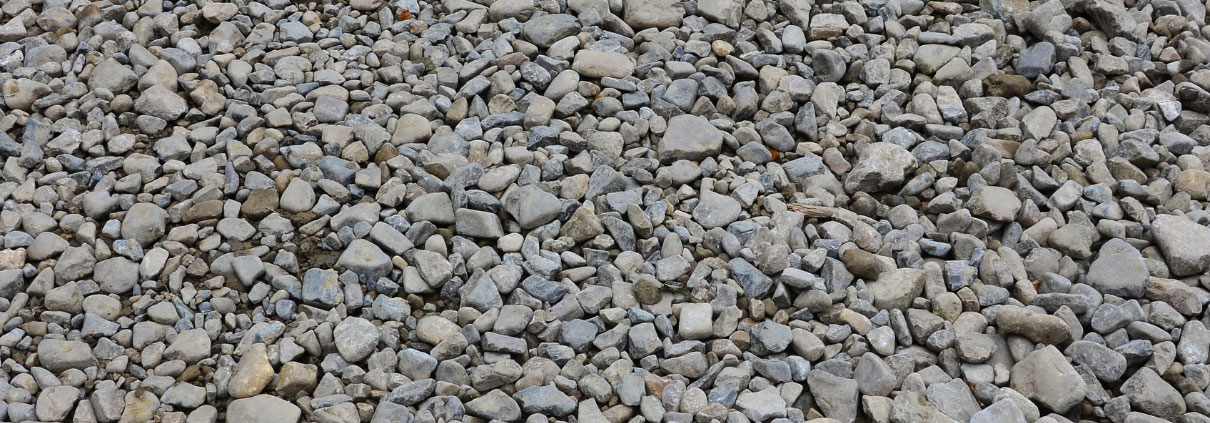
Creating the perfect foundation for a paver project, whether it's a paver patio, walkway, or driveway, is critical to ensure its longevity and maintain its aesthetic appeal. A crushed stoneCrushed stone is a form of aggregate composed of rocks that have been broken down into small, angula... base offers the ultimate foundation, providing stability, proper drainage, and a solid foundation that will keep your pavers looking great for years to come.
This guide will delve into why a crushed stone base is essential, how to properly prepare and lay it, and the role of a hardscape contractor in achieving the best results for your paver installations.
Just like a house needs a good foundation to stay up, a paver project needs a solid base to last long and look good.
Imagine building a sandcastle where the sandSand is a fine, granular material composed of finely divided rock and mineral particles. It is a fun... is too wet or too dry. If the sand isn't just right, the castle won't stay up. It's similar with paver projects, like walkwaysResidential walkways are pathways that connect different areas of a property, such as entrances, gar... or patiosPatios are outdoor spaces adjacent to a home, typically used for dining, entertaining, or relaxation.... If you just put pavers on top of the soil, the ground underneath can move around because of the weather or people walking on it. Over time, your beautiful patio or walkway could become uneven and wobbly.
That's where a crushed stone base comes in. It's like a strong, even layer that sits under the pavers. This layer does a few important jobs:
Building a good crushed stone base is about putting together layers that each has a job to do.
The first step involves carefully removing the top layer of soil to reach the desired depth for your base materials. This depth should account for the combined height of the gravelGravel consists of small, loose, rounded or angular stones, typically ranging in size from a few mil... base, sand layer, and pavers, plus an extra margin to ensure the finished surface is levelA level is a tool used to determine whether a surface is horizontal (level) or vertical (plumb). It ... with the surrounding ground.
You'll need to mark out the area clearly, using stakes and strings for straight lines or marking paint for curved designs. Using tools suited to the size of your project, such as a shovelA shovel is a versatile hand tool used in landscaping and construction for digging, lifting, and mov... for small areas or machinery like a backhoe for larger spaces, excavate the area to an even depth.
Once the area is excavated, it's crucial to assess the type of soil you're working with. Soils with a high content of sand or gravel may require less preparation, while those with a significant amount of clayClay is a natural, fine-grained soil material that becomes pliable when wet and hardens when dried o... or organic material might need additional steps to stabilize the base.
In cases where the soil is particularly loose or fertile, replacing a portion of it with a more stable material or laying down geotextile fabric can help prevent the base materials from mixing with the soil and ensure a more stable foundation.
The process of laying the base materials begins with the placement of larger, clean stones. These stones form the foundation layer, which stabilizes the subsequent layers of material. Over this foundation, spread an even layer of crushed stone or pea gravelPea gravel is a type of small, rounded stone typically about the size of a pea, hence the name. It i.... This layer should then be thoroughly compacted to enhance the stability of the base.
Achieving a level surface at this stage is critical; tools such as a laser levelA laser level is a precision tool used in landscaping and construction to ensure that surfaces and s... or a straightedge with a level can help ensure uniformity. The final layer consists of stone dust or Dense Grade Aggregate (DGA), which should also be compacted and leveled. The stone dust fills any remaining gaps, creating a smooth and stable surface for the sand and pavers.
An essential aspect of preparing a crushed stone base is ensuring that the finished paver surface will have adequate drainage. This is achieved by sloping the base materials away from any structures, at a gradient of about 1%, to facilitate water runoff and prevent pooling. In areas with heavy rainfall or high water tables, incorporating drainage solutions such as pipes beneath the base layer can further enhance the effectiveness of your drainage system.
When choosing materials for your paver base, it's important to consider their properties and how they will contribute to the stability and drainage of the finished surface:
Ready to transform your outdoor space with a beautiful, durable paver project? West Hills Masonry can help. Our team of experienced hardscape contractors knows how to build a crushed stone base that will make your pavers look amazing and last for years. Contact us today to start your project on the right foundation.
 Carlos Gonzales
Locations We Serve
Schedule A Consultation